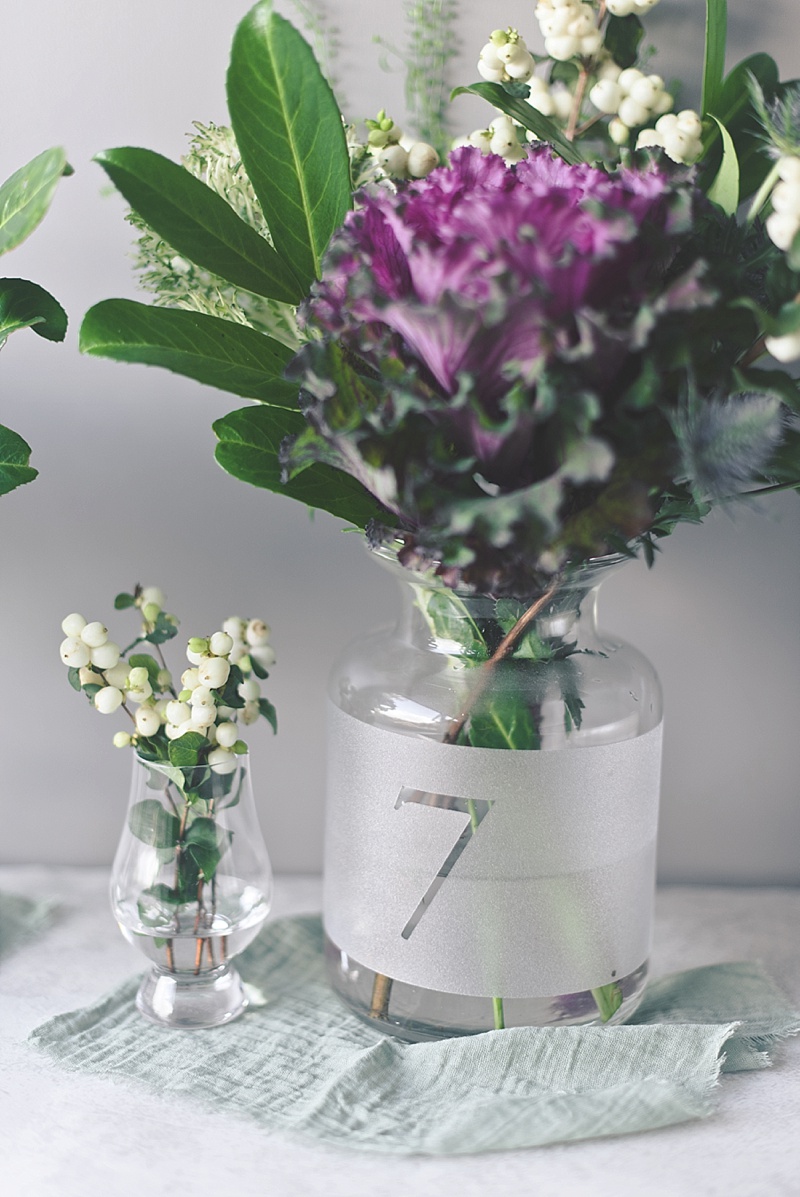
Who knew window cling vinyl could be so perfect for modern weddings?! From water carafes to centerpiece vases, these frosted "belly band" table numbers can pretty up any reception table while communicating with your guests on where to sit, and you don't need glass etching cream to make them!
Since it's window cling and 100% removable, you can reuse your bottles or vases after the special day at home or you can upcycle the glass bottles into various gift ideas for your loved ones. Homemade limoncello for birthday presents, anyone?

How to Make Chic Water Carafe Table Numbers for Your Wedding with your Cricut machine
Difficulty Level: Easy
PROJECT MATERIALS
• Glass water carafe bottles (we used IKEA Korken bottles)
• Measuring tape
• Frosted window cling
• Electronic cutting machine (e.g., Cricut)
• StandardGrip cutting mat
• Gauze napkins for bottle scarves
• Our Cricut Design Space project that you can click and make without any changes!

INSTRUCTIONS
1. Using a measuring tape, measure the diameter around your glass bottle and determine how tall you’d like your "belly band" to be for your table number. Our bottles are 11" tall and 11.5" in diameter, so our "belly band" is 11.5" in length and 4" in height and the number itself is 2.5" tall.

2. In your Design Space, make a long rectangle shape and choose the font you'd like for your numbers. Chunkier the font, the better! (Or you can also use our Cricut Design Space project for the template to get started.) After you have chosen your font, resize your numbers to fit your band. To get your machine to cut out your numbers in the middle, you will need to slice your rectangle and your numbers together. Slicing will consolidate your design and ensure your number will cut inside of your rectangle.
Once everything is sliced, you will have three layers — a number, a rectangle, and your consolidated belly band (number + rectangle). Delete the solo number and the solo rectangle layers. You should only have the final "sliced" belly band remaining. You should see your Design Space "grid background" in the middle of your number which will mean that it's transparent and your belly band will cut correctly.

3. Since you're using window cling vinyl, you will need to make sure your cut settings are chosen for the window cling material. The frosted side of the window cling vinyl should be facing up on your StandardGrip cutting mat. Select your machine's correct cut settings and then Make! After it's finished, take away the bits that you do not want on your water carafe.

4. Place the table number wrap face down (shiny side up) on a table and center appropriately. Once you have it in place, wrap your frosted prettiness around the bottle and now you have yourself a table number!

5. If you’ve been to a fancy restaurant that has a sommelier, you'll notice that wine bottles (especially for red!) have adorable little bottle scarves on them to prevent wine from dripping on everything after pouring. (We like to also call them little capes because why not!). Do the same for your carafes to help your guests keep your table number in good condition and for a little detail that will decorate your bottles in your wedding colors. Window cling is waterproof, but with an important multi-purpose sign detail being handled by multiple people, it’s best to future-proof it.


TUTORIAL CREDITS
Photography, Styling, and DIY Tutorial: Chelsea Barton (originally designed for Jen of Something Turquoise) | Gauze Napkins: DecoVita via Etsy | Window Cling Vinyl: Cricut
Editor's Note: Specially curated by us, the above product links are partner-connected and purchasing through these links means we get a small commission from those brands that helps support this website. You can find our full affiliate disclosure policy here on Tidewater and Tulle.

