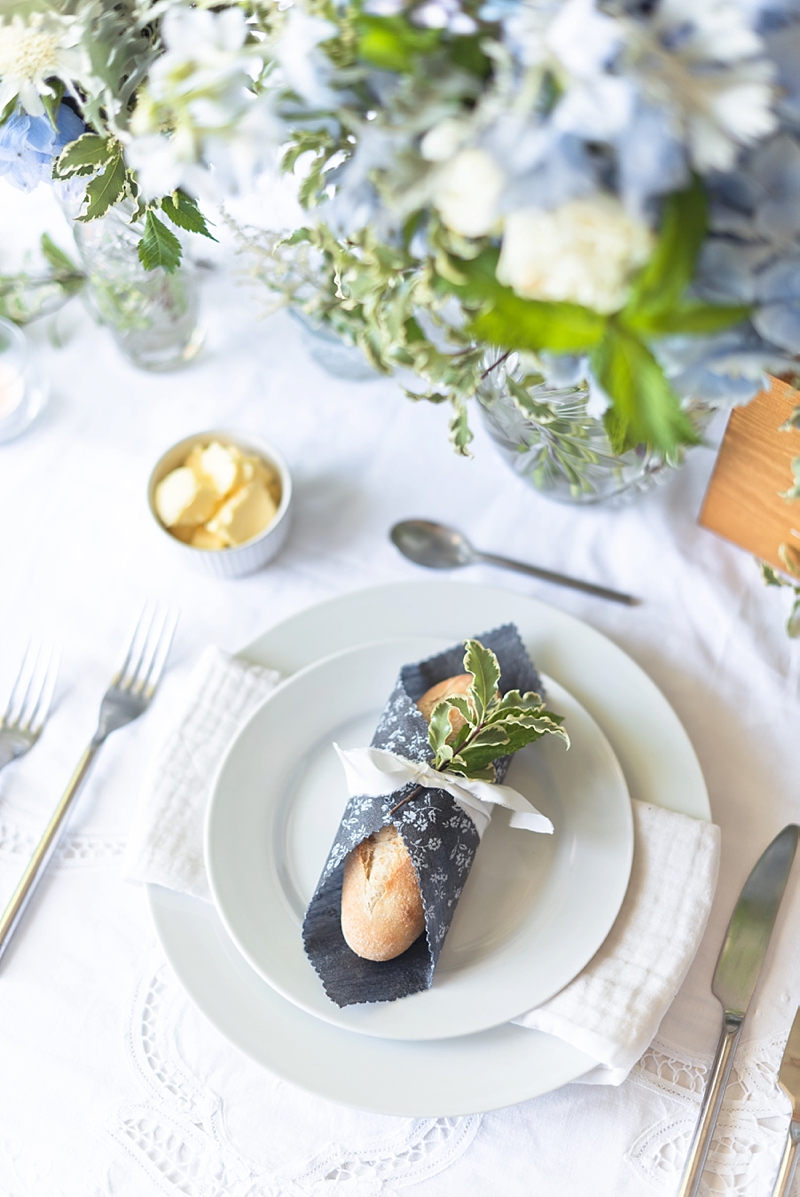
If you remember our homemade lavender soap or seed bomb wedding favors, then you'll love our latest eco-friendly DIY project! Our adoration for pretty and practical wedding favors continues with chic beeswax wraps that your guests will totally appreciate (and if you have leftovers, winning for you!)!
Inspired by French countryside style and a love of bees, you can give a small gift with big impact while also introducing an earth-friendly idea that your guests can replicate at home to help cut down and eliminate single use plastic wrap. Wedding love extends to eco love easily with this tutorial! You better bee-lieve it!

How to Make Beeswax Wrap Wedding Favors
Difficulty Level: Easy
Color Inspiration: French blue, sage green, and white
PROJECT MATERIALS
• 100% cotton fabric
• Scalloped-edge pinking shears
• Ethically-sourced beeswax mixture bar (made of beeswax, jojoba or coconut oil, and pine or tree resin)
• Wide bristled paintbrush
• Cheese grater
• Parchment paper
• Baking/cookie sheet pan
• Oven
• Paper towel
• Sewing pins or needles
TABLE SETUP DETAILS
• 1/2" width silk ribbon
• Floral centerpieces
• Wooden table number
• Embroidered cotton tablecloth
• Silver flatware
• Tea light candles
• White plates
HOW MUCH BEESWAX MIXTURE DO I NEED?
When using a Superbee beeswax mixture bar, you can get about 10 square feet of beeswax wraps out of each bar depending on the thickness of your fabric, technique, and size. We found we got twelve (12) 6-inch fabric squares per bar and also learned we needed a bit more beeswax material for our chambray cotton fabric.
CAN I JUST USE PLAIN BEESWAX?
For the most effective beeswax wraps, there is a science for why beeswax, jojoba/coconut oil, and tree/pine resin mixed together is the winning food wrap combination! Beeswax is obviously the main ingredient, but it's not as bendable by itself and will crack. The oil helps add flexibility and has natural anti-bacterial properties. The resin adds the stickiness you need to create an airtight seal around your food. So with this power of three, you have the recipe for a perfect beeswax food wrap and eco-friendly wedding favor.
DO I HAVE TO USE COTTON FABRIC?
Most all tutorials you'll find for beeswax wraps will advise you to use cotton, and that's simply because it's a natural fiber, highly absorbent, and won't melt when intensely heated. Bonus is that cotton is also inexpensive to get in abundance! When choosing your cotton fabric, be mindful that the fabric will turn slightly yellow (or darker) when the beeswax melts onto it, so consider non-white patterns for your wedding favors.

INSTRUCTIONS
1. Before you begin your project, wash your cotton fabric, dry, and iron out the wrinkles. Pre-washing your fabric allows your fabric to absorb the beeswax better and removes any fabric manufacturing residue.
2. Cut a piece of paper towel down to 6" x 6" square. This paper towel square will serve as your cutting template and help make cutting fabric squares in a large quantity easier and quicker! Using sewing needles and pinking shears, pin the paper towel template onto your fabric and start cutting your wrap squares.
HELPFUL TIP: Don't skip the pinking shears! This special type of sewing scissors prevents your fabric from excess fraying which is particularly important when your beeswax wraps will be handled a lot. It also adds a fun decorative edge to your wedding favors!

3. Preheat your oven to 200°F (or its lowest temperature setting) and adjust your oven racks so you can access your baking sheet(s) quickly.
4. Using a cheese grater, carefully grate your beeswax mixture bars into a bowl. (Don't worry about shredding too much! If you wish, any leftover shreds you might have can be melted back down into blocks with a silicone mini cupcake mold pan for stackable, easier storage for next time.)


5. Put a piece of parchment paper on your baking/cookie sheet, sprinkle your beeswax shreds to the size of your fabric square and place your fabric square on top of your shreds. We recommend keeping your fabric's pattern facing up. The beeswax will melt into the fabric and seep up from the bottom, so you do not need to sprinkle beeswax on both sides.
PROJECT NOTES:
Since chambray cotton fabric (the one we chose for our project) has a slightly looser, softer weave than other cotton fabrics, we did ours "wax underneath" as this gave us the best finishing look for our squares. If you're using a tightly woven cotton fabric which is more common, you can place the fabric square on your parchment paper first and sprinkle the beeswax on top like a pizza. With either method, we recommend keeping your fabric's pattern facing up for a lovely finish.


6. Place your baking sheet in the oven for 5 minutes, allowing the beeswax to completely melt. You will start to see the liquid beeswax mixture seep through the fabric as it melts. After completely melted, take the baking sheet out of the oven.
7. Quickly use your paintbrush to evenly spread out the melted wax so that every part of the fabric is coated. Return the baking sheet into the oven for another 2 minutes.

8. Once finished, quickly lift your beeswax wrap from the baking sheet by its corners and wave gently to dry. Wax may still be hot so act cautiously. If your wraps have any spots that you might have missed, no worries! Just place back into the oven for a few minutes, use your brush, and try again. This project is very forgivable (which also makes this a fun one to do with your flower girls, ring bearers, or kiddos in residence)!
9. Set the wrap aside to completely cool and repeat the above steps for the rest of your beeswax wrap wedding favors. (You will notice in the photo below our final beeswax wrap is on the left while the untreated fabric is on the right. There is a color difference!)
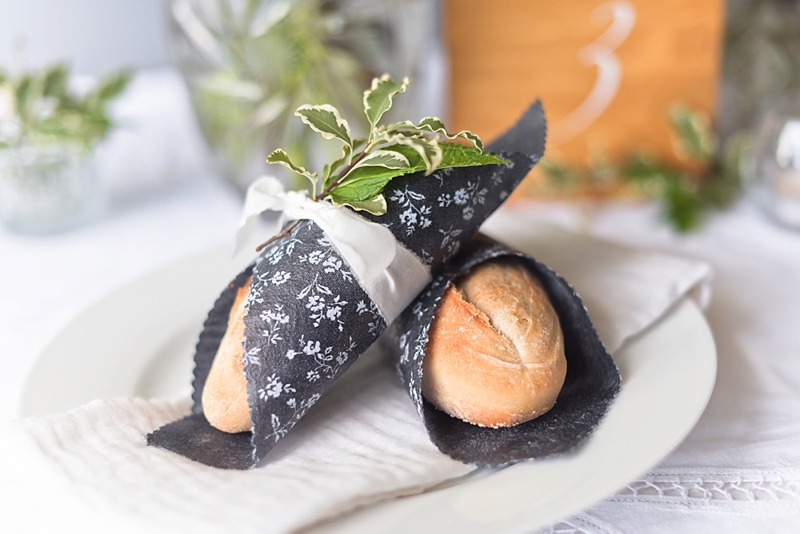
10. For the wedding day, the possibilities are endless for giving them out to your guests! You can fold your wraps and create a little personalized belly band for guests to take home at the exit. Or like we have done in our project, you can wrap them around little baguettes on your guest's dinner plate as an elegant way to multi-purpose your wedding decor.


CLEANING TIPS:
After you have completed your project, use olive oil to help clean your cheese grater and baking sheet. To remove wax from your paintbrush, allow your brush to soak in mineral spirits for 2 minutes, swish the brush, then clean with mild dish soap and warm water.

How to Use and Care for Beeswax Wraps
Making some wraps for yourself? Or want to share how your guests can use them at home via little info cards? The best thing about beeswax wraps is that they are super easy for anyone to enjoy with very little knowledge of how the science works! Basically you can use these beeswax wraps for anything... except raw meat or fish since these foods require hot water washing to kill bacteria.
To use at home, place your beeswax wrap over your dish or leftovers and gently fold around or rub around the edges. The warmth of your hands will help create an airtight seal just like plastic wrap. After use, beeswax wraps should be washed or wiped down in cold water and mild dish soap.
And of course, beeswax wraps cannot be used in the microwave or oven as the heat will melt the beeswax mixture. These pretty eco-friendly food savers can be used in the refrigerator, freezer, and at room temperature.
With proper care, your beeswax wraps should last for 8-12 months. If you need to re-wax your well-loved wrap, just follow the above tutorial to give it a second life.


Save The Bees & Source Your Beeswax Ethically
We all know there's a global declining bee population, and that's a big problem that we definitely don't want to contribute to when using beeswax. So while being more eco-minded with eliminating single use plastic, be sure to ethically source your beeswax, too. Not only for the ease of a pre-made organic beeswax mixture bar we used in our project, we personally love SuperBee because it's a small ethical, fair trade company that promotes women's empowerment, eco-education, and more. Basically they're our kinds of people!
And because we are totally Team Bee, we wanted to also share ways that you can help save them in your everyday:
• Grow a bee garden. Plant bee-friendly flowers that offer lots of nectar and pollen for them. Don't have a lot of space? Even tiny window boxes and porch planters work to spread bee love and make the world a little more beautiful!
• Support local beekeepers. Local beekeepers are often unsung heroes of the farming world as they love, nurture, and care for their bees that literally help make local crops grow through their pollination. Purchase their honey and other bee-friendly handmade products to show support and keep these small hives alive. (Side fun facts: Eating locally-sourced honey can even help with seasonal allergies as your body builds up immunity to your local environmental allergens!)
• Donate to bee conservation efforts. Either with time or money, there are many U.S. and international organizations that are working hard to bring awareness and make change for the bee future. We recommend using Charity Navigator to decide to which bee charity to donate so you know where your resources go.
• Go chemical-free for your plants. In your backyard or green areas, use organic or natural for pest solutions. Synthetic pesticides and other yard work chemicals are very harmful to bees (which is mostly why the bee population is endangered). There are many ways to achieve healthy plants without dangerous chemicals... and they just might already be in your kitchen cupboard!
• Provide a bee habitat. From trees to untouched plots of land, bees can take shelter everywhere (even underground!). Did you know bees drink water, too? In your backyard, fill a shallow bird bath with water and place rocks inside of it for bees to perch and refresh. You can also make or buy a Bee Condo that has little tubes inside for bees to dwell. If you don't have garden or land access, you can also sponsor a hive through an organization of your choosing.
At the end of the day, it's hard to do everything. Eco-guilt is real, but every little or big effort helps. When it comes to the bees and taking care of the Earth in general, we encourage you to do what you can with what you have. Knowledge is power, and we believe small waves make a big impact when we all make them together.


Discover Other Eco-Friendly Wedding Ideas
on Tidewater and Tulle
• Elegant Ideas to Incorporate into Your Ethical and Eco-Friendly Wedding
• DIY Seed Bomb Wedding Favors
• Chic Ethical and Sustainable Gifts Mom Will Use Beyond the Wedding
• DIY Upcycled Wood Seating Chart
• DIY All-Natural Engagement Ring Cleaner Recipe
• DIY Lavender Soap Wedding Favors
TUTORIAL CREDITS
Tutorial Photography & Styling: Chelsea LaVere for Tidewater and Tulle | Florals: Apple Mint Florist | Table Number: High Oak and Co. via Etsy | Chairs: P&W Event Hire | Fabric: Bobbins and Buttons via Etsy | Beeswax Bars: SuperBee
Some of the above product links are affiliate-linked and purchasing through these links helps support Tidewater and Tulle at no cost to you! You can find our full affiliate disclosure policy here on Tidewater and Tulle.

